Preparing Core Temp
- Download Core Temp Remote Server.
- Open the folder where Core Temp is installed, create a 'plugins' folder if it doesn't exist and extract the zip file into a 'CoreTempRemoteServer' folder.
- Restart Core Temp, go to Tools, Plug-in manager and enable plug-ins.
- Select the plug-in and click Start, the status should change to 'Started'. You should be prompted to unblock Core Temp in Windows' Firewall, you must do it, or else it will block the server and you won't be able to connect.
*If you wish to see the connection status of the server, or change the default listening port you can click 'Configure' now. - Close the manager.
Linux users
- This is a Beta version.
- Download Linux Core Temp Remote Server.
- Make sure that you have Mono installed with 'corlib2.0'. For the WindowGui you also need 'winforms2.0'.
- Install lm-sensors
- Configure lm-sensors and enable 'coretemp' for Intel processors, 'k8temp' or 'k10temp' for AMD processors and 'via-cputemp' for VIA processors
- Run the Gui of your choice and configure it, more information is in the 'readme.txt' file.
Preparing your router
- Most of us have a router which connects us to the internet. If you would like to monitor your PC from outside of your network, a port must be forwarded.
There are plenty of guides on the internet about how to do it, it is usually a pretty straightforward procedure. The default port 'CoreTempRemoteServer' listens on is 5200.
You must forward a port for every PC you want to monitor, the external port of each must be different. Most routers allow you to specify one external port and forward it to a different port internally.
This way you can forward port 5200 --> 5200 for your Main PC and 5201 --> 5200 for your Gaming rig. You don't necessarily have to change the server's default listening port to get everything working on several PCs at once. - Some have a static IP address from their ISP, this means that your external IP address never changes, you can simply use that as your 'Hostname' when configuring Core Temp Monitor.
If your IP address is dynamic, there are plenty of dynamic DNS services out there that will provide you with a URL which redirects to your current IP address. After signing up you will need to configure your router to use this service.
Setting up Core Temp Monitor on your device
- First of all you need Core Temp Monitor. You can get it at the Market.
There are two versions available:
The Lite version, which is free, includes an advert at the top and is limited to monitoring up to 2 machines.
The Standard version, which only costs $0.99, doesn't contain any ads and supports an unlimited (in theory) number of machines. - After you've selected your version and installed it, we need to add a new 'monitor'.
- Press the menu button and tap 'Add monitor'.
- Give this monitor a name, such as 'Gaming rig', 'Main', etc.
- Next you have to provide a host name or an IP address and the port used to connect to your machine.
- You can set the monitor to connect automatically when you start the app, and choose the fields that you wish to see in this monitor.
- Tap on save and you are done.
Using Core Temp Monitor
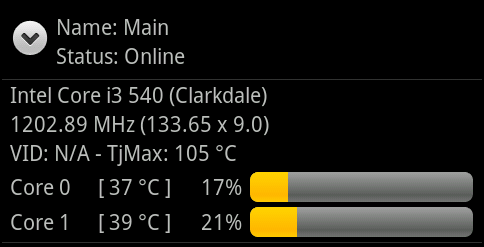
- After the app starts, you will see a collapsed list of 'monitors' we added in the previous section.
Tapping a monitor will expand it and reveal a more detailed information about the system. - Tap and hold a 'monitor' to open a menu, you can copy the status of your PC to the clipboard, configure or remove the monitor.
source
0 komentar:
Posting Komentar